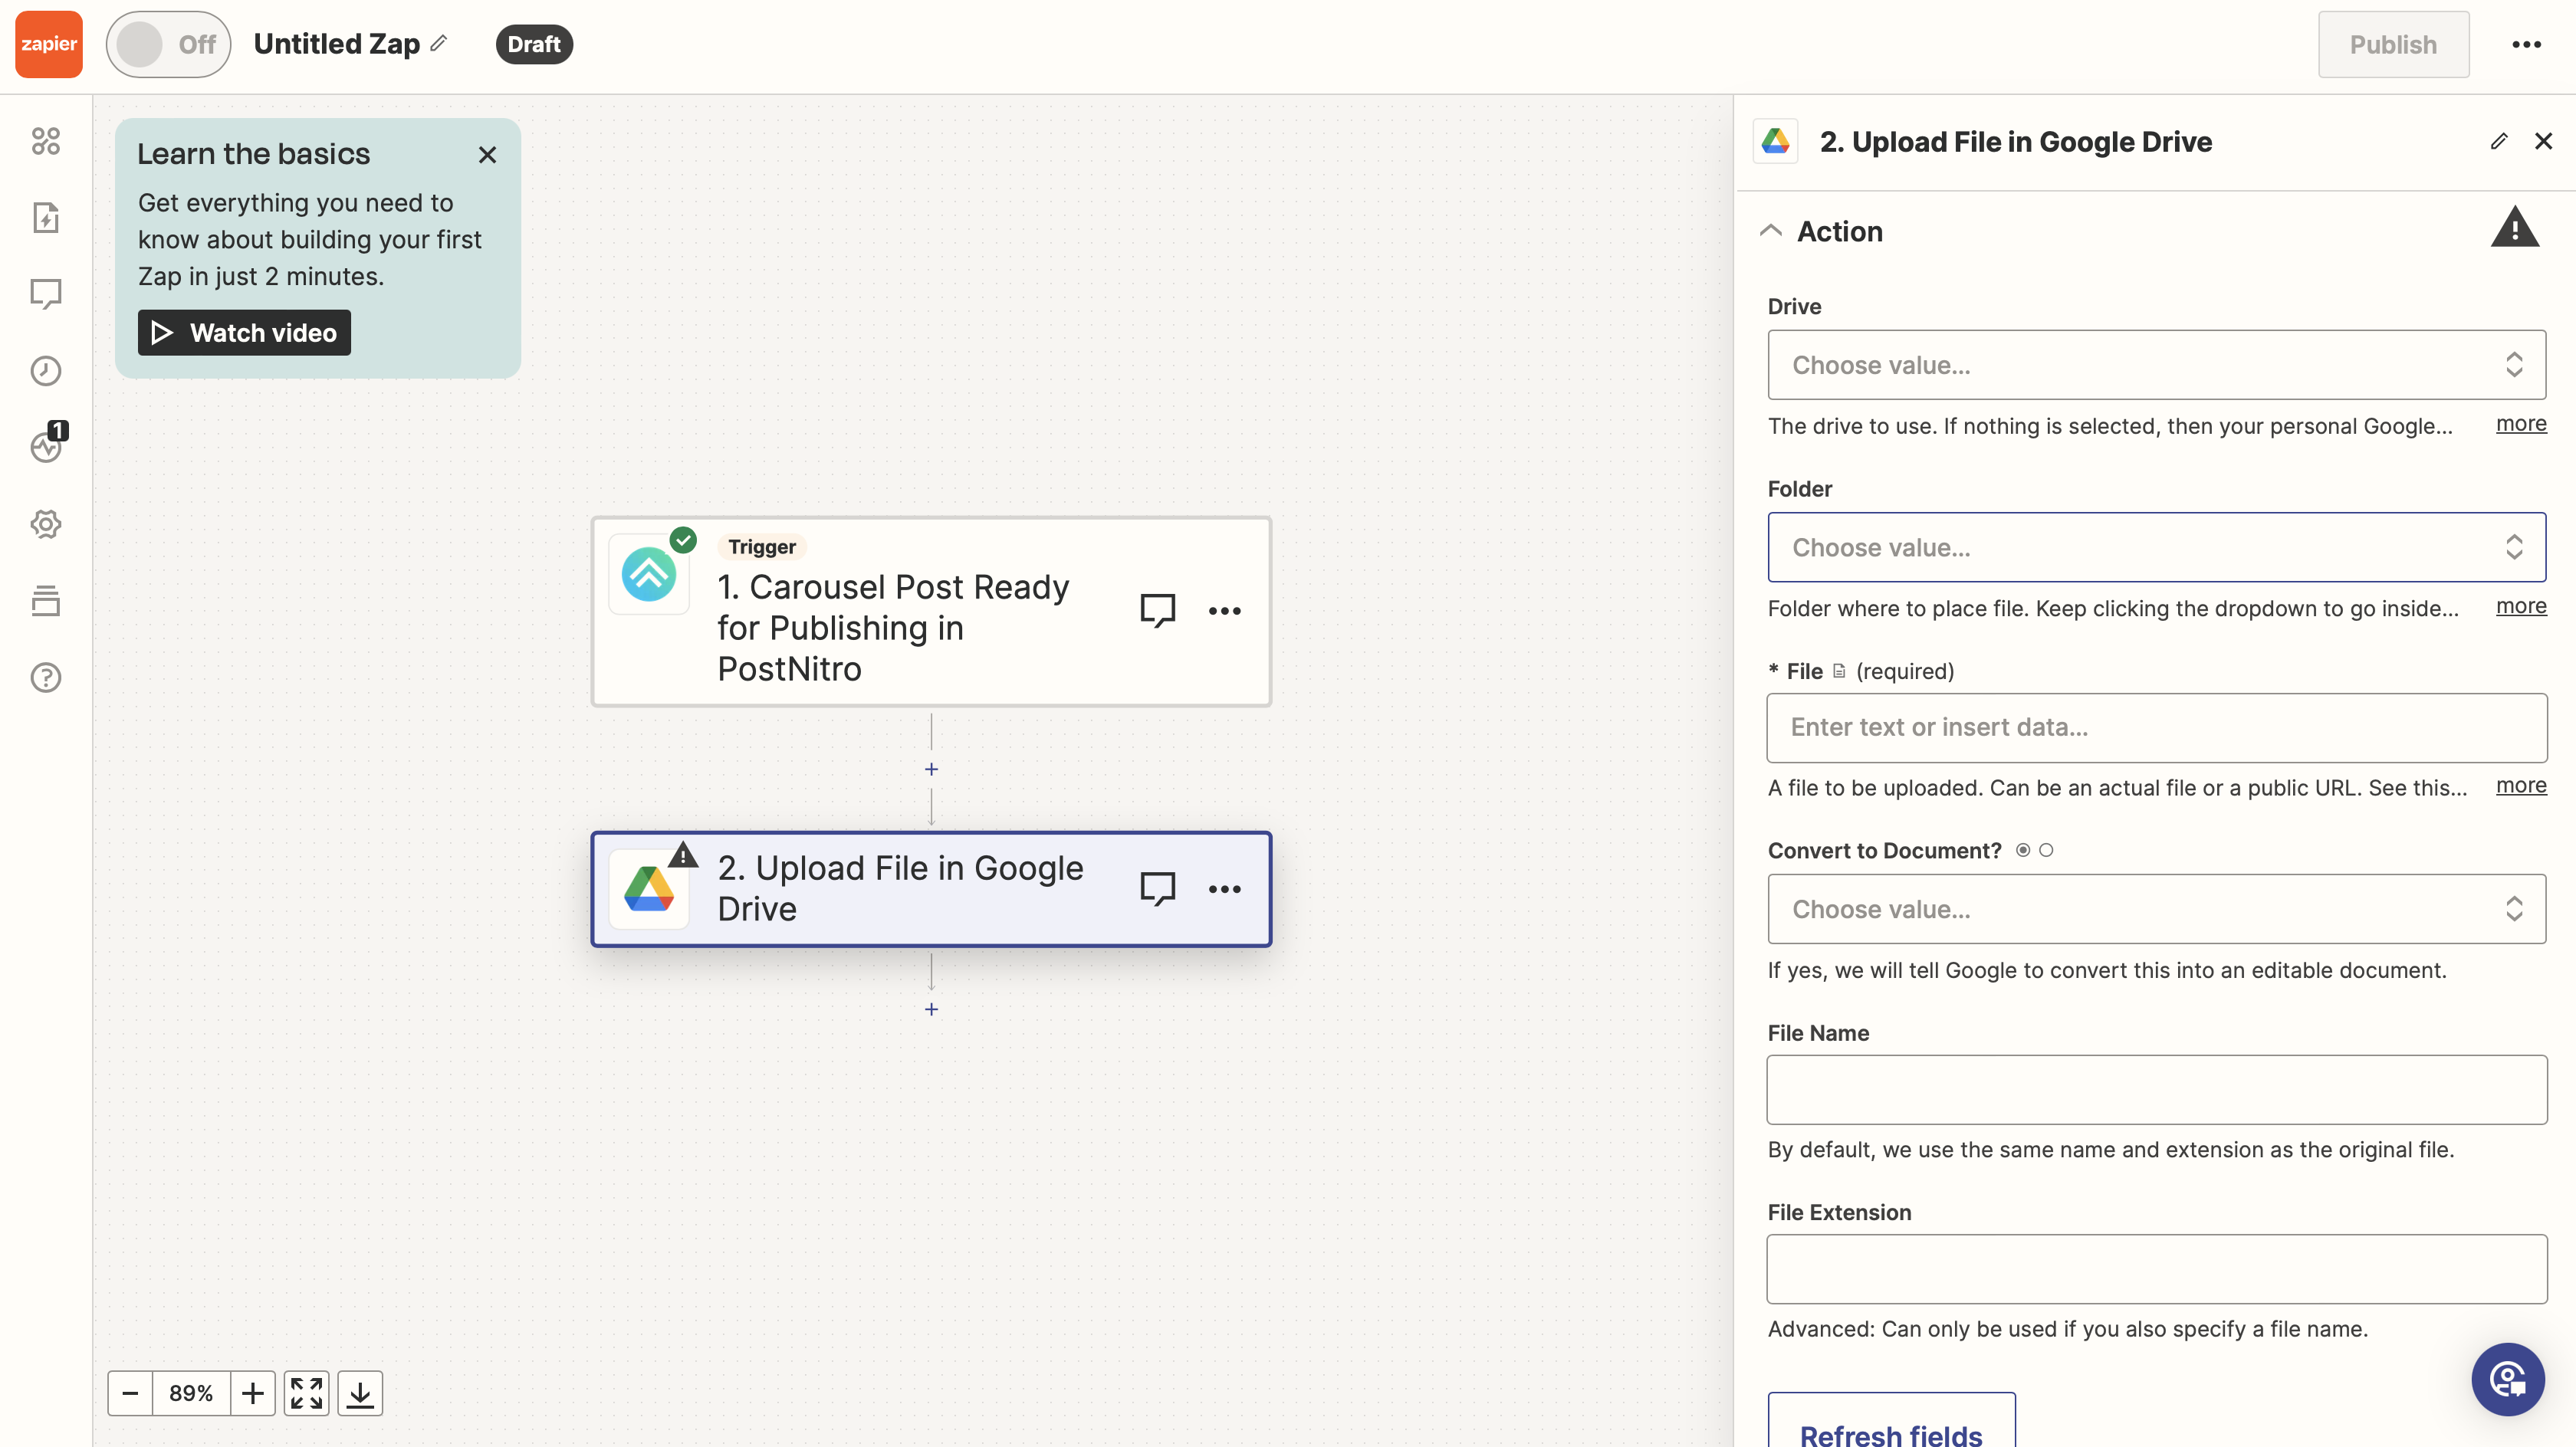
Create an Action
In this step you can add any of your prefered platform. As an example we are integrating with Google Drive.
Search and select Google Drive action.

From the Events for Google Drive, scroll down, select Upload File, and click on Continue.

Log in to your Google Drive account.
Since I’ve been testing the setup, my account is already logged in. You will see the + Connect a new account button to log in.

Now, let’s set up the Actions.

Click on the Drive drop-down and select My Google Drive or any other drive that you have connected on Google Drive.

Click on the Folder drop-down and select your desired destination for the Carousel.
I created the folder on my drive with the title Posts From PostNitro.

Click on the File drop-down and select Carousel Url.
Since we pass three parameters to Zapier, the Carousel Url parameter contains the carousel post in PDF format. The URL sent here is a public link to the PDF document.

Click on the Convert to Document drop-down and select False. Since we are already passing the data in PDF format, conversion here is not required.

Click on the File Name drop-down and select the Carousel Name parameter. This is the same name users set for their carousel posts.

Click on the File Extension and enter “pdf”.

Now everything is set. Click on Continue.

Finally, click on the Test step button to test the Zap.

You will get a success notification; now, all you need to do is Publish your Zap.

To validate, navigate to your selected folder to see the PDF file on Google Drive.

Pro tip: Don’t forget to name your Zap :D
